Song Mastering | Mixing | Music Editing
(we provide these services for all styles of music)
Turn Around time >> 1 song 24 hours/Album (10-15 songs) 72 hours
Mixing Services
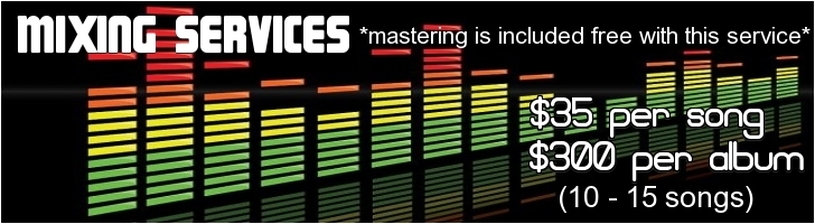
Audio mixing
What is mixing?
Professional mixing is the absolute best way to improve your sound. The majority of serious artist/musicians these days record and produce their music from within a home project studio, but don't have the mixing experience or equipment to compete with professional engineers working in professional studios. If you have recorded the project yourself and have attempted to mix it but are unhappy with the results, it may be a good idea to have someone else to mix it for you.
How does it work?
You send us the song to mix with a general or specific direction you want us to go in. We will process the song (listen to it from a whole song perspective and start mixing it immediately) until we have completed the mix to our professional industry standards. Then we will email you a link for you to download your mix. You download it, burn it to CD and listen to your song.
How do I send you my files for mixing?
The best way to send your multi track session files is to send each individual tracks in WAV or AIFF format (don't change the sample rate or bit rate), all the tracks should be consolidated (parts joined together in one piece) from the staring point of the session. Please label each file specifically and correctly (example: lead vocal, kick drum, strings, dub vocal, etc.) plus include the bpm/tempo which makes it a lot easier when discussing possible edits and general details of the song. *Read at the bottom of this page on details on consolidating tracks for sending* or watch this video on how to consolidate your tracks/regions for mixing here >>> how to consolidate files for mixing
Effects such as compression, reverb, eq etc should be removed from the tracks and sent dry. However, if you feel the effects are needed to the intended sound then by all means leave them on and send a dry alternative if possible. It can be very useful to include notes on how you want the track to sound and even by supplying your own rough mix for our engineers to get an impression of the general balance you originally intended.
Effects such as compression, reverb, eq etc should be removed from the tracks and sent dry. However, if you feel the effects are needed to the intended sound then by all means leave them on and send a dry alternative if possible. It can be very useful to include notes on how you want the track to sound and even by supplying your own rough mix for our engineers to get an impression of the general balance you originally intended.
Sending us your audio online
Step 1
Make your payment for mixing services by clicking the Buy Now paypal button.
Step 2
Send us your audio files online using this free large file transfer service Wetransfer.com to [email protected]
* Be sure to put "Mix my song" in the subject email box
Step 3
We fully mix and master your songs and send them back to you by via email within 3 - 5 business days, it's as simple as that!
Sending a cd for mastering please notify us by email before sending your cd.
If you can't use paypal we also accept money orders, western union or money gram transanctions,
just be sure to make them out to Vernon Royster Jr.
Sending a cd for mixing Be sure that all data files are properly consolidated for mixing.
You can send your cd's to P.O. Box 541602 Grand Prairie, Tx. 75054
IMPORTANT! We recommend you make a duplicate copy before you send it, please do not send your only copy.
We will not be responsible for any damage or loss through the postal services.
What if my mix doesn't sound right?
Once you hear the mix, there might be some things you might want to change about it. Simply contact us by email with your request and we will correct those changes and send you another updated mix. Again you download and listen, and if needed, you can make more change requests. This process will continue until we know that you are satisfied with your mix. All this is included in our flat rate with no hidden charges.
 Audio mixing services |
|
Details on how to consolidate and send your audio files in most DAW (digital audio workstation) programs.
The following are instructions for how to consolidate files in DAWs. These instructions were generated by people who have used these programs and have been successful with the results, or watch this video on how to >>> how to consolidate files for mixing
Please select Broadcast Wav or Wav if your software gives you a choice of file formats. After consolidating the files, please put them in a ZIP folder and use this free sending service listed here. Wetransfer.com or SendSpace.com
Consolidating regions in Pro Tools HD, LE, and M-Powered:
On the Mac -
1. Ensure that the audio tracks are all clearly named.
2. Highlight all the audio in the Edit Window, making sure you've successfully selected before the beginning of the early-most region and after the end of the last-most region.
3. Press and hold Option and Shift, and while pressing them, press "3" (the one above the QWERTY keyboard, not the numeric keypad).
Alternatively, you could select "Consolidate Selection" from the Edit pull-down menu.
4. To export these new files, highlight them all to select them, and press Command + Shift + "K".
Alternatively, you could select "Export Selected as Files" from the Audio Regions List pull-down menu.
Remember to export them as 24-bit wav or broadcast wav files, using the "(Multiple) Mono" format.
On the PC -
1. Ensure that the audio tracks are all clearly named.
2. Highlight all the audio in the Edit Window, making sure you've successfully selected before the beginning of the early-most region and after the end of the last-most region.
3. Press and hold Alt and Shift, and while pressing them, press "3" (the one above the QWERTY keyboard, not the numeric keypad).
Alternatively, you could select "Consolidate Selection" from the Edit pull-down menu.
4. To export these new files, highlight them all to select them, and press CNTRL + Shift + "K".
Alternatively, you could select "Export Selected as Files" from the Audio Regions List pull-down menu.
Remember to export them as 24-bit wav or broadcast wav files, using the "(Multiple) Mono" format.
Consolidating regions in Logic:
From the Arrange page choose File > Export > All Tracks As Audio Files
Remember to export them as 24-bit wav or broadcast wav.
Consolidating regions in Cubase/Nuendo:
1. Select the Range Tool, and highlight all tracks from 0:00:00.000 through to the very end of the very last region.
2. From the Audio menu, select Bounce and Replace Events.
3. From the File menu, select "Save Project to New Folder" or "Backup Project", and all the new consolidated files will be available in that new project's Audio Files folder. Just be sure to check the box labelled "Remove Unused Media" to ensure only the consolidated files appear in the Audio Files folder.
Consolidating regions in Sonar:
1. Highlight all clips in the first track, right click, and select "Bounce to Clip".
2. Highlight all clips in the second track, right click, and select "Bounce to Clip".
3. Repeat these steps for the remaining tracks.
4. Once all clips have been consolidated, click File > Export > Audio
5. Set audio to export as 24-bit RAW Broadcast Wave Files. Be sure not to use "Fast Bounce".
Consolidating regions in Garage Band:
1. Disable all automation, plugins, etc.
2. Solo the first track, and select "Export Song to Disk" from the Share pull-down menu.
3. In the subsequent dialog box, make sure that the Compress box is left unchecked, click Export, and name the file according to the solo'd track's contents.
4. Solo the second track, and select "Export Song to Disk" from the Share pull-down menu.
5. In the subsequent dialog box, make sure that the Compress box is left unchecked, click Export, and name the file according to the solo'd track's contents.
6. Repeat the steps for the remaining tracks.
Consolidating regions in Digital Performer:
1. Put a piece of audio at 0:00:00.000 on every track.
2. Select all the audio in all the tracks, and be sure.
3. Select Merge Soundbites from the Audio pull-down menu.
Note that this will create new files, which can be retrieved from the Audio Files folder. Just sort the files by Date Created so that they are grouped together.
Alternatively, after merging the soundbites, you could go into the Soundbites Palette and select the merged tracks to be exported, then choose "Export Soundbites" from the palette's mini-menu. This will bring up a dialog from which you can select the desired format, resolution, and destination. Remember to export them as 24-bit wav or broadcast wav files.
Consolidating regions in Reason:
Simple Method (yields lower quality audio):
1. Set start marker to Bar 1.
2. Set end marker to the end of the song.
3. Turn off all effects on the mixer, as well as any effects modules you may be using (reverbs, delays, etc) and set all levels to unity gain. Just make sure none of the channels are clipping. If they are, turn the fader down on that channel, or turn down the output of the module feeding that channel.
4. Solo the first track, preferably using the sequencer, not the mixer.
5. From the File menu, select "Export Loop As Audio File".
6. Choose the export format. Remember, use 24-bit wav or broadcast wav.
7. Click "Save".
8. Repeat these steps for each track.
Advanced Method (yields higher quality audio):
If you have a compatible host DAW, it's best to use the ReWire protocol to pipe the Reason tracks into the host DAW. This will bypass the Reason 14:2 mixer, yielding higher quality audio. Be sure to bypass any effects, and record the audio into DAW. Then just Export the new audio files from the DAW.
Consolidating regions in Reaper:
1. Highlight from 0:00:00.000 to just past the end of the song.
2. Solo the first track.
3. From the File Menu, select "Render".
4. Un-solo the first track, and solo the second track.
5. From the File Menu, select "Render".
6. Repeat this with every track until all tracks have been rendered.
Once you've rendered all tracks, you can select them from the Audio Files folder; I recommend copying them to a new folder for ease of transfer.
Consolidating regions in Fruity Loops:
1. Split all the instruments or sounds onto their own mixer channels.
2. Name each channel according to the sound it's playing back and bypass effects inserts on each channel and the master channel.
3. Put the file in SONG MODE.
4. Clear any region set in the playlist.
5. From the File menu, select "Export"
6. Ensure "Split Mixer Tracks" selected, and export as wav or aif files.
Naming the base file "[the name of your song]" will help to organize the exported files by grouping them by your song's title. For example, the Drums track would be called "[the name of your song] Drums", the Bass would be called "[the name of your song] Bass, etc.
Consolidating regions in Audacity:
1. Name all your tracks.
2. Select "Export Multiple" from the File pull-down menu.
3. Set Export Format to WAV, Split files based on Tracks, and Name files Using Label/Track Name.

